Sunday, 28 January 2018

Web API Token Based Authentication

 Web API Token Based Authentication


Introduction


In this article, I will tell you how to create token based authentication in WEB API using OWIN easily.

Background


Authentication and authorization is very much important in every project. There are so many articles already written for authentication in web apin. Therefore, in this article I will tell you how to create token based authentication in Web Api using OWIN within 10 minutes. 

First I will tell you 

1. What is Token Based Authentication : 

In Token based authentication users allows to enter username and password to obtain a token which allows them to fetch a specific resource without using their username and password. Once their token has been retrieved, the user can offer the token – which offers access to a specific resource for a time period


2. OWIN (Open Web Interface for .NET) :

OWIN defines a standard interface between .NET web servers and web applications. You will get more information from http://owin.org/


Advantages of OWIN

1. Scalable: The token itself holds all encrypted user info, so adding more servers to your web farm is an easy task.

2. Mobile Friendly: Comparing with cookies, storing token in native mobile platforms or browsers could be a standard way.

3. Decoupled: Any server providing token Auth service could be an alternative option.You can plug any middlewares (and as many as you want) between the webserver and your application.

4. Safer: CSRF Attack Prevent.

5. Performance: Decoding token to get use info is usually faster than querying DB.

Disadvantages of OWIN


Need additional code to store and send token.

Using the code


1. Create WEB API Application  : 

First we will create empty WEB API application using visual studio 2017

 Web API Token Based Authentication


2. Package Installation :

 We will add below package to our solution


Install-Package Microsoft.AspNet.WebApi.Owin -Version 5.2.2
Install-Package Microsoft.Owin.Host.SystemWeb -Version 2.1.0
Install-Package Microsoft.AspNet.Identity.Owin -Version 2.0.1
Install-Package Microsoft.AspNet.Identity.EntityFramework -Version 2.0.1
Install-Package Microsoft.Owin.Security.OAuth -Version 2.1.0
Install-Package Microsoft.Owin.Cors -Version 2.1.0


3. Create below cs files in your project

1.Add below code in WebApiConfig

 Web API Token Based Authentication
Add caption


2. Add below token based configuration in Startup.cs

 Web API Token Based Authentication


3 Create new class SimpleAuthorizationServerProvider which will inherit OAuthAuthorizationServerProvider class which has two methods ValidateClientAuthetication and GrantResourceOwnerCredential

 Web API Token Based Authentication


4. Add new Web Api controller. Give name as TokenTestController

 Web API Token Based Authentication


4.Testing Token based authentication using POSTMAN

1. We will access token using token method

 Web API Token Based Authentication


2. Then we will try to access /api/TokenTest/Authorize method directly without token. It will respond 401 as expected.


3. We will again send above request  along with the token from above #1 and we will get respond 200 as expected. As we have implemented token based authentication


Happy Programming!!

Don’t forget to leave your feedback and comments below!

If you have any query mail me to Sujeet.bhujbal@gmail.com     

Regards
Sujeet Bhujbal
--------------------------------------------------------------------------------
--------------------------------------------------------------------------------






Tuesday, 22 August 2017

Asp.Net Core Duplicate 'Content' items were included. The .NET SDK includes 'Content' items from your project directory by default

Hello Friends

I got one error message in asp.net core while upgrading to Visual Studio 2017 version 15.3.1

Duplicate 'Content' items were included. The .NET SDK includes 'Content' items from your project directory by default. You can either remove these items from your project file, or set the 'EnableDefaultContentItems' property to 'false' if you want to explicitly include them in your project file. 


So Solution for this error message is


  1. Click 'Show All Files' in Solution Explorer
  2. Right click over 'wwwroot' select 'Exclude From Project'
  3. Right click over 'wwwroot' select 'Include in Project'


Thanks
Sujeet 

 Happy Programming!!

Don’t forget to leave your feedback and comments below!

If you have any query mail me to Sujeet.bhujbal@gmail.com     

Regards
Sujeet Bhujbal
--------------------------------------------------------------------------------
-------------------------------------------------------------------------------

Friday, 28 July 2017

What is ASP.NET Core


What is ASP.NET Core


ASP.NET Core is the latest Web application development framework from Microsoft. It is a redesign of the old ASP.NET framework and has already popular. ASP.NET Core is Open Source framework that you can use to build Web and Cloud applications. Most importantly, ASP.NET Core is available on Windows, Linux and Mac platforms.


Microsoft has made important changes with ASP.NET CoreNow, it is open source and available on GitHub. On GitHub, you can find everything about ASP.NET code and download it if you need


What is ASP.NET Core


In Visual Studio you will see 2 new project types
What is ASP.NET Core


New AppSetting.Json instead of web.config
What is ASP.NET Core


ASP.NET Core has a client side package manager which is inbuilt with ASP.NET 5 project and it is bower. It is a package manager for JavaScript, jQuery etc


·         In Old .Net applications when we make build for application all dlls goes into the bin directory, which is available inside the project. Now Bin directory has been placed inside the Artifact folder, which is new with ASP.NET 5.

·         Dependency Injection is supported by ASP.NET inbuilt. It supports DI by default. ASP.NET includes some built in container which supports constructor injection by default.

wwwroot folder will contain all the static content of the application in ASP.NET Core like js files, css files, images as well.


ASP.NET Core has a client side package manager which is inbuilt with ASP.NET 5 project and it is bower. It is a package manager for JavaScript, jQuery etc

No VB.Net support as of now. It is to be added in future update.


Please check below microsoft article before choosing framework


Some Cons
·         Not all libraries are ready for core,
·         New means all api’s aren’t tested by the age..coz its new.
·         All stuff you do are new even to other people, so if you find a problem, you probably need to solve/figure it out on your won, because everyone is still new to it..


 Happy Programming!!

Don’t forget to leave your feedback and comments below!

If you have any query mail me to Sujeet.bhujbal@gmail.com     

Regards
Sujeet Bhujbal
--------------------------------------------------------------------------------
--------------------------------------------------------------------------------

Thursday, 13 July 2017

Install Visual Studio 2017 Offline

Install Visual Studio 2017 Offline 


As Visual Studio 2017 is released, there is no ISO available for Visual Studio 2017 But we can download Visual Studio 2017 using command prompt


Step 1: First thing you need to download the installer from Visual Studio Website

https://www.visualstudio.com/vs/visual-studio-2017-rc/

Step 2:  Create a folder VS2017 in your drive. Here i create folder on E drive

Step 3 :  Now to download the offline installation files, you need to run the installer in the command line mode with a layout & language parameter. 

Step 4: Open the command prompt as administrator and enter the VS_enterprise.exe with the layout.For e.g. to create offline installation files for English, you can try the following command.

vs_enterprise.exe --layout C:\vs2017 --lang en-US

Install Visual Studio 2017 Offline


Step 6: After entering the command,  another dialog will open as follows.

Install Visual Studio 2017 Offline

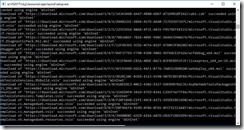
Step 7: After that, it will give you the progress about the downloading of packages.


Install Visual Studio 2017 Offline


Once all the required packages are downloaded, this command prompt will close automatically. At any moment, you can use the same command again so that new updates will be downloaded.


Step 8 : Install Certificates

In the layout folder, you will find a certificates folder with several certificates.


 Right click on each certificate and install them.


A wizard will start and guide you through the installation process. I didn’t change any default values in the wizard, just click Next in each step until you reach the last step.


Click Finish button, you will get a success message if everything ok.


Repeat the same for each certificate available in the certificates folder. Once you installed all the certificates, you can start Visual Studio installation. 


Step 9: Installing Visual Studio 2017 using exe. In the layout folder, you will find vs_enterprise.exe. 


Step 10 : Run vs_Enterprise.exe and the installation will start immediately, click continue in the splash screen


Step 11 : You will see the new installation experience of Visual Studio 2017. You can select the necessary components and click on the install button.


Note : You can download community edition as it is free for developer and Total size the of visual studio is 18GB if you select more features then size may increase.


 Happy Programming!!

Don’t forget to leave your feedback and comments below!

If you have any query mail me to Sujeet.bhujbal@gmail.com     

Regards
Sujeet Bhujbal
--------------------------------------------------------------------------------
--------------------------------------------------------------------------------